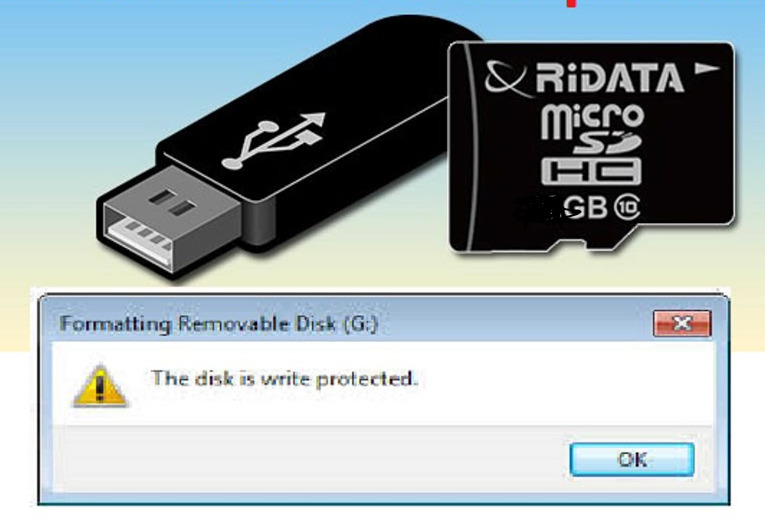
USB drives and similar transferable data storage devices are useful if you want your photos, media, settings, or work files ready to go. It’s been a while since these storage devices have become the most popular method of storing digital data. USB drives and storage are not considered fixed drives, so they are mounted as removable media.
How to disable BitLocker on a USB drive
To disable BitLocker on a USB flash drive, you must have the recovery key or password. You will need to reformat the drive if you have no other choice. If you have the key or password for BitLocker, follow the steps below.
- Open “File Explorer” and find the storage device you have in mind. If the icon has a lock on it, BitLocker is enabled for the device.
- Right-click on the icon and go to “Manage BitLocker”. This step takes you to the BitLocker Drive Encryption window, where a list of all storage drives and their encryption status is displayed.
- All you have to do now is click on the protected USB drive and select “Disable BitLocker”. Enter the password or select other options, then choose to enter the recovery key. The status shows that the device is being decrypted and BitLocker is disabled when complete.
Use Diskpart to disable USB write protection
Diskpart is a command line tool that allows you to manage all the storage drives detected by the computer. To remove write protection with Diskpart, follow these steps:
Check and write down the storage capacity of the USB device. This tip will come in handy later. After confirming the space limit, connect the USB drive to the computer port.
- Start “Command Prompt”. You can do this by pressing “Windows Key + R” and typing “cmd” or by searching for Command Prompt in the “Start Menu”. If you see the “Access Denied” message, right-click Command Prompt and choose “Run as administrator.”
- At the command prompt, type “diskpart” and press “Enter.”
- Then type “list disk” and press “enter” again.
You will see a list of all storage drives, named Disk 0, Disk 1, etc. Use the storage capacity you wrote down in “Step 1” to identify your USB device. Compare it to the “Size” column and you will find the disk number. - Type “Select Disk #”, where “#” is the disk number. For example, if your USB key was “Disk 1”, type “select disk 1” without the quotes, then press “enter”.
- Type “Disk Attributes Wipe Read Only” and press “Enter.” Yes, “attributes” has an “s” and “read-only” is a word.
- Finally, wait for the write protection removal to complete, type “Exit”, then press “Enter/Return” to close the command prompt window.
Restart your PC and try to write to the USB drive again after the system restarts.
Use the Windows registry to disable USB write protection
Accessing the Windows Registry is not recommended for inexperienced users. An incorrect entry could seriously affect the performance of your system or make it unresponsive. Don’t worry though. Even if you are not familiar with the internal functions, you will be able to remove the write protection if you follow our method very carefully. Just make sure you don’t take any action other than the steps specified below.
- Connect the removable storage device to your PC, type “regedit” in the Cortana search bar, then select the “Registry Editor” application and click “Open”.
- Click the “right chevron” symbol (angle bracket) next to “HKEY_LOCAL_MACHINE” in the left sidebar to expand the directory structure of that folder.
- Repeat the procedures in “Step 1” to expand the “SYSTEM” folder, then do the same for “CurrentControlSet”. The full path so far should be “HKEY_LOCAL_MACHINE -> SYSTEM -> CurrentControlSet”.
- Repeat the procedures in “Step 1” again to expand the “Control” folder, then confirm if “StorageDevicePolicies” is present. If not, go to “Step 5” to create it yourself. Otherwise, go to “step 7”.
- Right-click on the “Control” folder. Select “New” and choose “Key”. This step will create a new subfolder under “Control”.
- Rename the newly created folder to “StorageDevicePolicies” without the quotes.
- Now right click on “StorageDevicePolhere”, choose “New”, then select “DWORD (32-bit) Value”. Name the new entry “WriteProtect” without quotes or spaces.
- Double click “Write Protect” and replace “Value Data” with “0” and “Base” with “Hexadecimal”.
- Click “OK”, exit the registry and restart your computer.
After rebooting, check if the USB is now working as it should. This method disables write protection on all your drives, so it should make your USB drive writable again. Keep in mind that editing the Windows registry yourself can mess up your computer, so after following our instructions, it’s best not to go back to it.
Change security permissions in flash drive properties
If using DiskPart as shown above does not work to clear the read-only attribute of a USB flash drive, it may be necessary to change the security permissions. Security permissions can be set so that all users only have read permissions to the flexor files.
Open My Computer or File Explorer.
Find the USB flash drive in the list of drives connected to the computer.
Right-click on the flash drive icon and select Properties from the context menu.
On the General tab, check the File System entry to see how the flash drive is formatted. Select the appropriate link below based on your file system type.
- NTFS file system
- FAT file system
NTFS file system
- In the Properties window, click the Security tab.
- Click the Edit button in the User or Group Names section.
- In the Permissions window, click the Everyone entry, if it isn’t already selected. In the Permissions for Everyone section, make sure the Allow box is checked for the Edit entry. If not checked, check the box.
- Click the OK button on the Permissions and Properties window to save the security permissions change.
If you want to make the flash drive read-only for everyone, in step 7, uncheck all the boxes in the Allow column except the Read entry.
FAT file system
- In the Properties window, click the Sharing tab.
- On the Sharing tab, click the Advanced Sharing button.
- In the Advanced Sharing window, check the Share this folder box.
- Click the Permissions button.
- In the Permissions window, click the Everyone entry, if it isn’t already selected. In the Permissions for Everyone section, make sure the Allow box is checked for the Edit entry. If not checked, check the box.
- Click the OK button in the Permissions, Advanced Sharing, and Properties windows to save the permission change.
- If you want to make the flash drive read-only for everyone, in step 9 uncheck all the boxes in the Allow column except the Read entry.
Conclusion
it is important to know how to format a write-protected USB flash drive in order to keep your data safe. Follow the steps outlined in this article and you will be able to format your drive correctly.