Have you ever had your whole computer shut down while you were playing a video game? There are several reasons why a computer may shut down, but one of the most prevalent is when the CPU overheats.
Thermal throttling kicks in when a CPU’s temperature rises to a level that it considers hazardous. Due to exceeding acceptable operating temperatures, a thermal throttle restricts the maximum processor utilization. This slows down the CPU, enabling the cooling system to keep up with it.
How To Lower CPU Temperature
Sudden system shutdowns are typically caused by a sudden slowdown. Warranty-voiding and damaging to integrity and lifespan, and simply an all-around terrible idea, running a component beyond its safe operating temperature. Left unchecked, CPUs that are running too hot might potentially destroy CPU sockets, which would make motherboards inoperable. Don’t be alarmed if all of this seems terrifying; it can be simply avoided. To keep your computer from overheating, here are a few simple techniques to lower its temperature.
When a CPU reaches an unacceptably high operating temperature, what happens?
Most current PCs shut down when the CPU reaches a certain manufacturer-defined temperature to order to avoid a costly and very deadly electrical fire. This failsafe keeps you and your PC secure from additional heat harm while also keeping you safe. High running temperatures, even if they are within the maximum allowed, might harm the CPU and the motherboard over time and drastically limit the CPU’s lifespan, even with this safeguard. All PC components follow this model: the greater the steady temperature, the shorter the expected lifespan.
The answer to this question is: it depends.
This is a fairly open subject, and it relies on a wide range of factors, including the location of the PC, the casing, the CPU, the CPU cooler, and the number of fans the PC has. Temperatures between 158°F (70°C) and 176°F (80°C) should be seen on a “typical” gaming PC under severe CPU stress. This goes without saying that the better your cooling system and the lower your CPU temps are when under stress, the better. Under heavy strain, you want your CPU to reach 114°F (46°C). Your CPU will thank you for it later. Here, you’ll discover the finest software for monitoring CPU temperatures.
Ways to keep the temperature of the CPU at a lower level.
1. Improve the movement of air
Make sure that your PC’s ventilation is set up correctly to guarantee that your CPU does not overheat. Although open airflow cases are not included since they are a whole different beast, there are a few setups you need to know about for your “regular” PC cases. First, there’s ‘Positive pressure,’ which forces more air into your PC than it can expel, resulting in a buildup of heated air within the machine. Negative pressure is the reverse of this, in which the PC case exhausts more air than it receives. As a result, there’s a gaping hole in the air that we’d want to fill. It’s not optimal to have these two setups. Because of this, the only way it would operate effectively would be if you had access to and control over every single fan.
A ‘neutral pressure’ setup ensures that no air is trapped or stagnated within your PC case since it allows for an equal amount of air to enter and exit.
2. Management of the cables
Cable management plays a role in not just CPU temperature control, but in general temperature control as well. Messy connections may interfere with the clean flow of air and produce object resistances we don’t need when we want to establish an effective cooling environment that is free of obstructions. Keep an eye on those wires.

3. Your computer’s location
A poorly ventilated environment is another major cause of high CPU temperatures. Even if your airflow setup is very efficient or your case is highly rated for airflow, your CPU will overheat if you don’t have any cold, fresh air flowing into it.
4. Clean up your computer
You must keep your PC’s fans in good working order since they are the only source of air intake and exhaust. Fans are exposed to more air than any other PC component since they are the sole hardware that moves air through your computer. Dust and particles are a byproduct of being exposed to so much air. Ventilators accumulate dust and should be cleaned regularly, just like anything else in your home. As long as you keep your home clean, your computer will grow dusty. You don’t want any of these concerns, such as electrical problems or fan failures, to arise as a result of all the dust. Simply take your PC outdoors and use a can of compressed air to clear out the fans. To avoid having to purchase a can of compressed air every few weeks if you’re a serious player, consider investing in a compressor.
- Remove the side panel and remove the screws from the rear.
- Removing the side panel requires extreme care.
- Use a can of pressurized air (or a compressor) to clear any lingering dust from the surface.
- Remove the dust from the fans using a broom.
- Its power supply fans may be cleaned with the use of a can of compressed air.
- The compressed air may be used to remove dust from around the casing, particularly in regions where fans are mounted.
- Replace the side panel and tighten the screws.
5. Comparing an open with a closed case
Open-air cases have long been debated in the PC industry as having an advantage in terms of ventilation. This, however, is paradoxical, since open-air examples generate more problems than they solve. However, if done well, they may be stunning. Without a closed directed system, cooling is less effective. Aside from allowing additional dust to enter, the lack of different filters makes the open case an even worse air quality issue. As a result of these basic facts, open-air cases have been banned. If you don’t mind cleaning your computer once or twice a month.
6. Apply new thermal paste
Open-air cases have long been argued to be better for ventilation in PCs, but the reality is that they create more problems than they cure. When done correctly, though, they look stunning.
Due to the lack of numerous filters, the open case’s cooling capabilities become less effective without a closed directional system. Because of these few basic considerations, open-air situations are out of the question. If you don’t mind cleaning your computer once or twice a month.
7. Apply a paste made specifically for this purpose, such as thermal
It is possible to lessen your CPU’s temperature by reapplying thermal paste. When the thermal paste is left undisturbed for a lengthy amount of time, it dries up and splits. Because it’s a thermally conductive material, the more you use it, the shorter its lifespan will be. Thermal paste’s lifespan and efficiency may be extended by investing in a higher-quality product, but in general, it should only last a few years with proper care. We won’t discuss how long thermal paste is meant to last since this is a subjective and situational issue. Thermal paste should be replaced once every one to one and a half years to maintain optimal performance. It’s also a good idea to reapply your cooler if you remove it for any reason. If you’re unclear on how to apply thermal paste, check out this article on how to do it correctly.
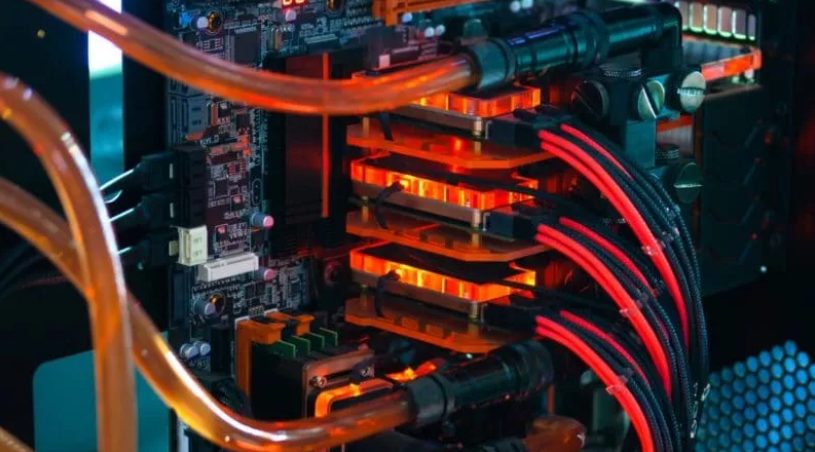
8. Buy a more powerful CPU cooling.
When all you need is a little amount of cooling capacity, stock coolers are the way to go. As for CPU temps, you shouldn’t anticipate much more than acceptable results from a sub-par cooling setup. If you’re willing to fork out a few hundred dollars for an aftermarket cooling system, the temperature difference may be astounding. Budget choices are available, of course, but like with everything, they have restrictions. If you want to overclock your CPU, it is preferable to use a high-quality CPU cooler like the ASUS Ryujin II. When it comes to lowering CPU temperatures and keeping them under control, AIO or (all-in-one) cooling is magic. AIO coolers bridge the gap between air coolers and liquid-based coolers, which might be disappointing compared to specialized water-cooling systems. A guide for AIO installs can be found on the page detailed above, in case you run into any problems when setting up your AIO.
9. How to cool down the CPU
The thermal paste dries up and splits if left unapplied for a longer period of time, therefore reapplying it might help decrease your CPU temps. Because it’s a thermally conductive material, the more you use it, the shorter its lifespan will be. By choosing a better-grade thermal paste, you may extend the life of the paste and boost its efficiency. But in general, the thermal paste can resist many years of usage, but this figure is subjective and situational, therefore we won’t lay out how long thermal paste is expected to last here.
Thermal paste should be replaced once every one to one and a half years to maintain optimal performance. It’s also a good idea to reapply your cooler if you remove it for any reason. If you’re unclear on how to apply thermal paste, check out this article on how to do it correctly.
10. Build up your fan base
Do you have a lot of fans on your computer? If the answer is three or fewer, you may want to consider purchasing a few more fans (providing your case supports extra fans). You should consider adding extra fans to your airflow system if you can, as we’ve already discussed. You’ll be boosting your PC’s ventilation, which will help it run cooler.
Invest in a power supply unit (PSU) that is semi- or completely modular.
To maintain a free flow of air, cable management is essential. Using a modular power supply might aid with cord management. It’s critical to understand the differences between non-modular, semi-modular, and fully-modular power supplies, as we explain in this article. Check out our top PSU for gaming features if you’re unclear whether one is perfect for you.
11. In the motherboard BIOS, increase the fan speed.
High CPU temperatures may be avoided by modifying the BIOS (basic input-output system) to manually alter the CPU fan or fan curve. Most computers come pre-programmed with the CPU fan control set to ‘Auto,’ which is meant to strike a balance between noise and performance. Even while controlling the fan’s speed using a temperature variable is clever and effective, it’s possible to get some more cooling power by just tweaking the curve. As a headset player, you don’t mind a bit of additional noise exploding from your PC, thus adopting a more airflow-heavy curve will help you attain better temps. It’s also worth noting that running your CPU fan at full speed for the foreseeable future will not help its lifespan. As an alternative, you may choose to change the curve more slowly if you’re more concerned about noise. For those of you who aren’t familiar with the BIOS of a motherboard, the following few steps may seem daunting. If you follow these instructions to the letter, you won’t have to worry about damaging your computer. The ‘Easy mode’ feature of most motherboards has access to fan settings; yours may not. Check your motherboard’s handbook or go to this page to see if you’re not sure.
12. Increase the speed of the motherboard’s fans in the BIOS.
When trying to avoid excessive CPU temperatures, manually tweaking the CPU fan or fan curve in your motherboard’s BIOS (Basic input-output system) might be effective.
To achieve a balance between noise and performance, the CPU fan control curve is set to ‘Auto’. Even while controlling the fan’s speed using a temperature variable is clever and effective, it’s possible to get some more cooling power by just tweaking the curve. As a headset player, you don’t mind a bit of additional noise exploding from your PC, thus adopting a more airflow-heavy curve will help you attain better temps. It’s also worth noting that running your CPU fan at full speed for the foreseeable future will not help its lifespan.
Alternatively, if you’re more concerned about a noisy gaming rig, you could want to experiment with a more gradual adjustment of the curve. For those of you who aren’t familiar with the BIOS of a motherboard, the following few steps may seem daunting. If you follow these instructions to the letter, you won’t have to worry about damaging your computer. The ‘Easy mode’ feature of most motherboards has access to fan settings; yours may not. Check your motherboard’s handbook or go to this page to see if you’re not sure.
- During power-on self-testing (POST), press ‘DEL’ to access the motherboard BIOS.
- Now go into your fan management program. For us, the name of the device is ‘Smart Fan 5’
- Manually regulate the CPU fan speed.
- Adjust the curve by moving each node on it.
- To save and quit, press ESC after you’re done modifying your curve.
Conclusion
It’s critical to your PC’s functionality and lifetime that you keep your CPU within the legally required safe operating temperature ranges. Doing so will save your PC from turning into an expensive smoke machine. Most of your PC hardware will live longer if it is kept cool, so monitor the temperatures to ensure the safety of both you and your PC. Not only is your CPU at the inner, but so is your whole system. High CPU temperatures might ultimately damage your CPU socket or perhaps your motherboard, resulting in additional costs for a new unit to be purchased and installed.
To avert this sad outcome, at least one of the ten techniques listed above should be used. I hope you have a good time playing.